Labor day weekend was full of labor around our place. We were delighted to have Erin and Natalie Durham and their friend Sara stay with us Thursday night, Natalie and Sara continued on their cross country road trip to Provo from Boston, and Erin spent the rest of the weekend with us. She was such a huge help and we really appreciated her energy and optimism. Tom and I had class Friday morning so we left her alone at the house. She had requested a project so we told her she could rip out the shag carpet in the blue room. I returned home to find it gone! Together we finished removing the padding and cleaning the floor, then we set up Tom’s twin mattress to look like a day bed- An idea I got from a magazine. The room looks a bit sparse, but heck- so does all of our house, so big deal! ( Tom suggested we start calling our living room the ballroom, as it makes its emptiness seem all the more appealing- How many of you have ballrooms?!)

(The lovely shag we had to remove- cough, cough)
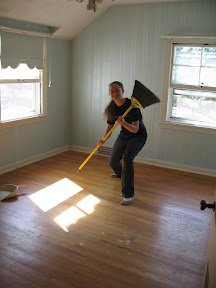

(Left: Our dear friend Erin, after removing the shag. Right: Guest room)
Our goal on Saturday was to check of as many of our Point-of-sale items as we could. Now, Tom and I are optimistic, but we were even surprised by how much more we got done with one more set of hands. Thanks Erin!
Tom replaced the doorknobs on the sunroom door, planed down the door to the half bath so it would close properly, fixed the dead bolt on the front door so both the door knob and the dead bolt could lock at the same time, ordered a new window to replace the broken one in the sunroom, but mostly replaced the flange on the toilet in the hall bathroom upstairs.
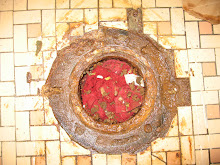
(Previous flange- broken on right side)
We had been cited for having a wobbly toilet. I had watched a DIY video from the library about wobbly toilets and learned that it is usually the result of a broken flange. So we removed the toilet and sure enough the entire right side was gone. The video I had watched had suggested using a metal piece that you slid under the existing flange, and screwed into place, but there was no way of getting anything under our flange, as it was completely leaded down. So Tom sought advice from the plumbers at our local hardware store and successfully installed a new flange over the old one, and sealed it in with waterproof concrete. He did a beautiful job, and we are happy to say that our toilet is now immovable!
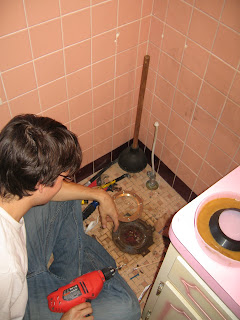
(Tom deliberating over how to solve the problem)
While Tom worked on the toilet, Erin and I set out to “rebuild the step unit” out front. Over the years the steps leading up to the path to our front door had slid down the hill about a foot. As a result the mortar had cracked, and the steps were overlapping sorely. Erin and I figured it would be a quick fix, we would just move the 200lb flag stone slabs up- right? Not so much. After several hours of exhausting shoveling, raking, moving huge stones back and forth, and repeating it all over again, we finally recruited Tom and together we finished the task. The results were beautiful.
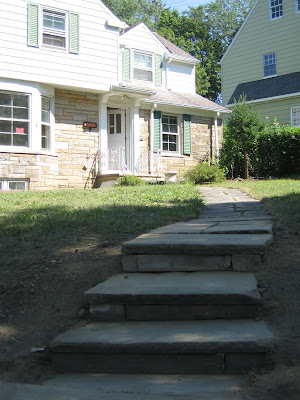

(So it’s probably excessive to post both of these pictures, but I prefer the first, and Tom likes the second. So alas; our new and improved step unit.)
Monday, we started in to several projects, and finished one. First we thought we would replace the shower pan in our Masterbath room. After using it for a week, it started leaking and we haven’t had a shower since. Yup, back to the bath. So, we spent a good hour searching the internet trying to find any information we could on How to Replace a Showerpan. We watched several youtube clips, read a bunch of articles, and then set out to do it. At first we cut out the grout along the sides of one tile. According to the movies, with the aid of a chisel and hammer it should have just popped off. Well it didn’t. No it never did, even after we pounded it to pieces with a hammer. Because, remember, our house is made of cement- and our shower is no different. The tile didn’t have any adhesive backing- it was pure cement. Oh the joy! So now we have several battered pieces of tile with chunks of cement underlayment missing on one side of our shower, after it became evident that there was no way we would come even close to finishing the job on Monday, I decided to forfeit the activity and suggested we work on some of the projects that we knew we could succesfully finish.
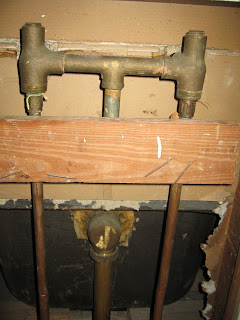
(The previous piping that was all removed and replaced)
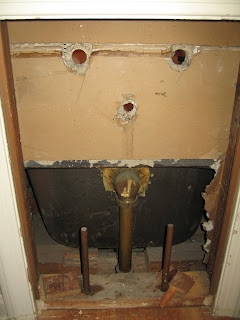
(Here is the faucet-less tub)
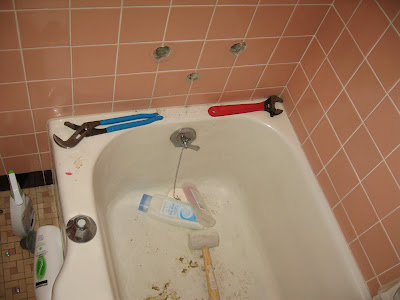
One of those was installing in the hall bath. It had only been a tub. The previous owner must have had an external shower head, and we had initially planned to just buy one of those, but we couldn’t find one at Home Depot. So we decided to go ahead and install one in the wall. Tom worked at it all day. The process involved cutting the two existing pipes that ran from the basement , and putting in a metal piece that would allow the water to be diverted to either the tub or shower. Then a pipe had to be added that would run the length of the wall up to the desire shower head heigth, and then all of that had to be soldered in place. The pipe running up to the shower head was too long to just fit in the small access hole, so Tom had to cut that in half and solder it while it was in the hole. All in all, it took him all day, and when it was about 8:00 he realized that he would need another 45 degree elbow pipe. At that point Home Depot was closed, and we just came to terms with the fact that the shower would have to wait. But then Tom, never willing to give up, decided to try using an extra supply line and valve we had left over from a previous project to connect the two pipes- and voila we had a working shower! We were both apprehensive about getting too excited before we had thoroughly checked it for leaks. We tried various water pressures, looked for leaks in various places and rooms and when we had finally declared the system leak-free we hugged and laughed and kissed- thrilled that at last we could shower!